

Tim Holtz Grunge Board
Ranger Distress Crackle Paint in Picket Fence
Ranger Adirondack Paint Dabber in Snowcap
Ranger Enamelware Embossing Powder (it's clear with white specks)
Embossing ink pad
Archival Ink (Black)
Stamp of your choice
Heat Gun (mine is a Harbor Freight Special)
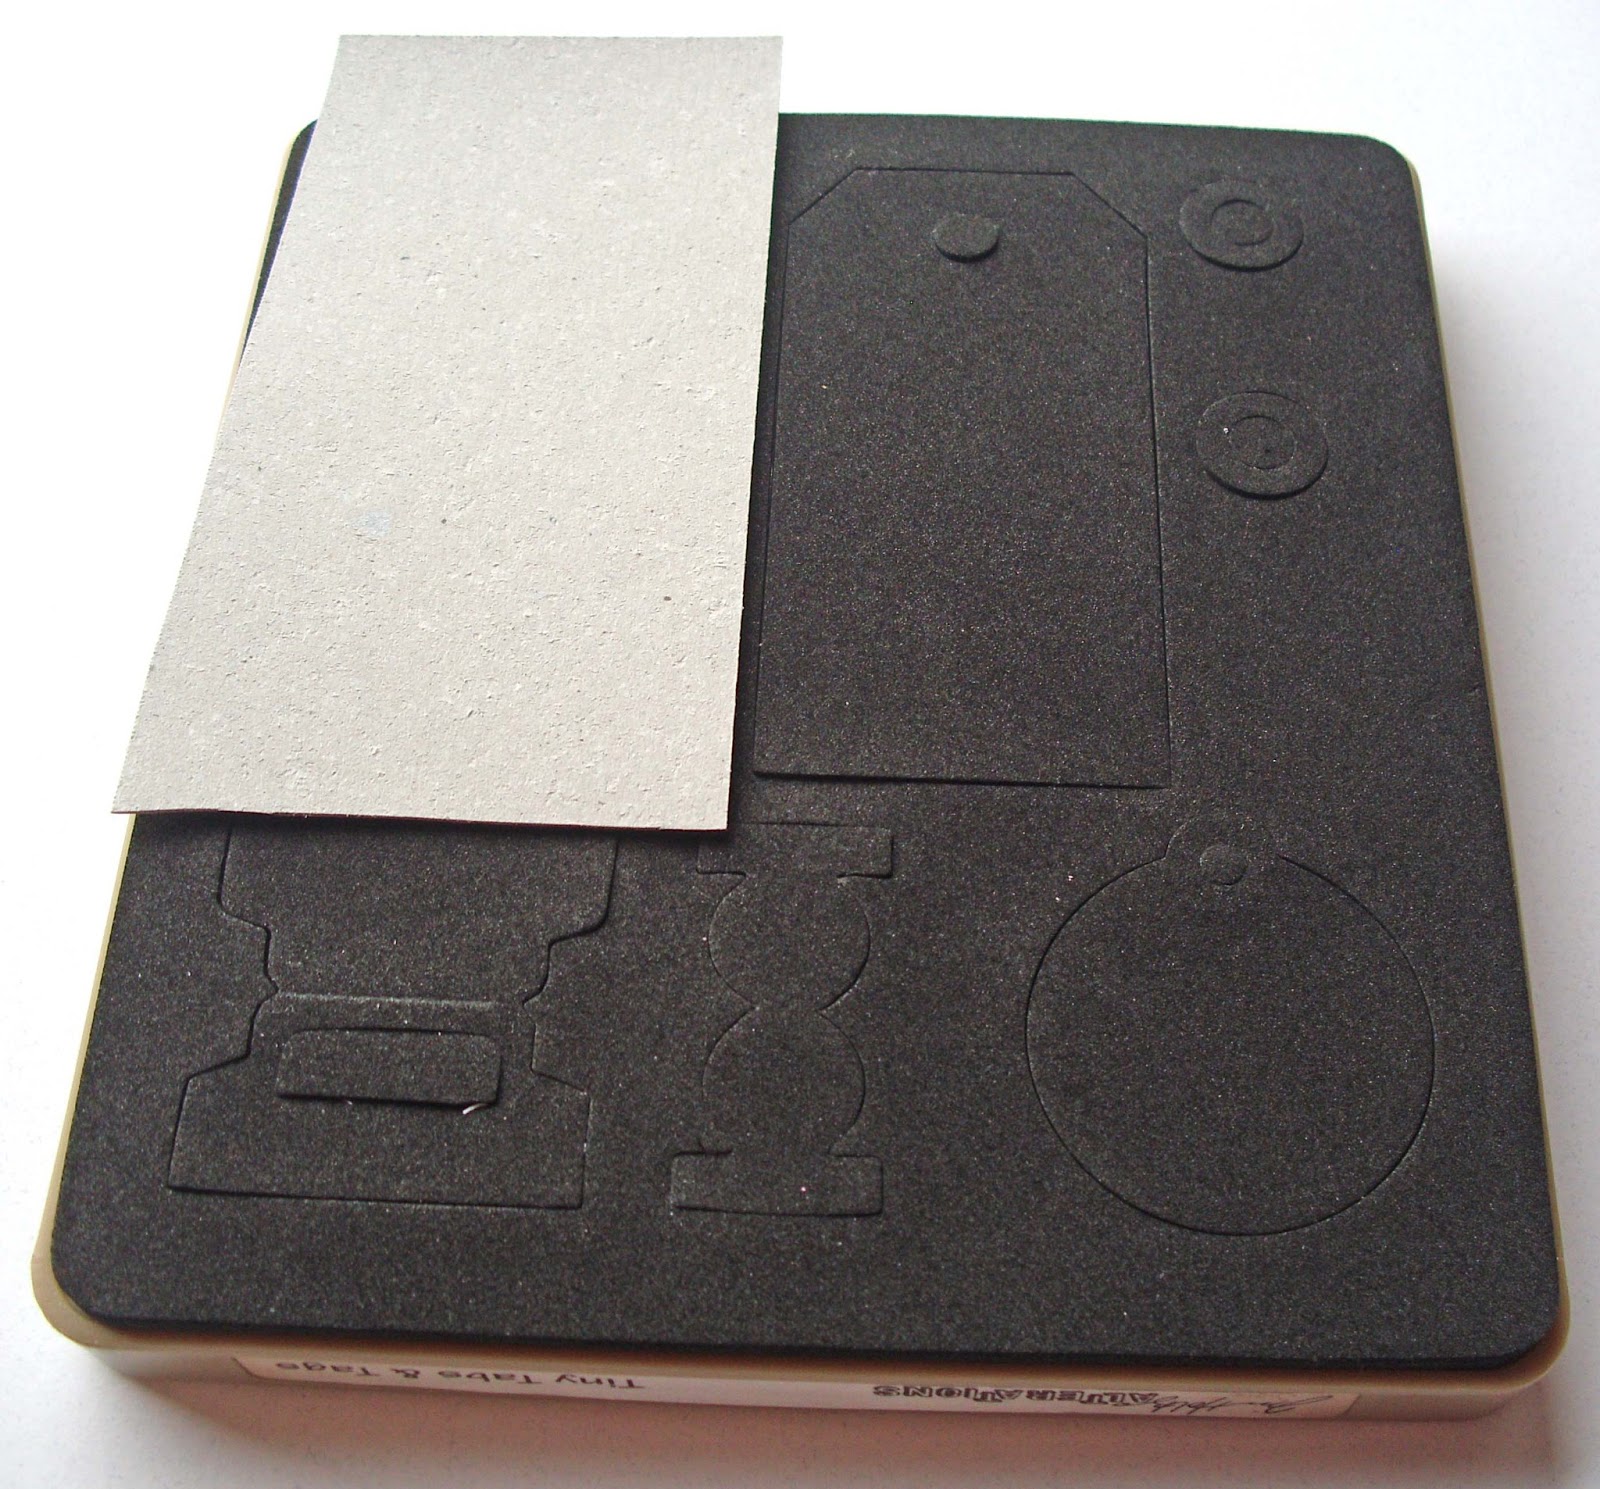
*Tim Holtz Alterations Tiny Tags & Tabs cutting die.
*(If you don't have a machine to run this die through, skip this one. You can always make a template of a shape you would like to use. Trace onto grunge board and cut out with scissors, you will also need a small hole punch).
These are my new "toys", aren't they awesome??? (I say with a big grin on my face).

To begin making the coolest faux enamelware tags in the world, ( I might be exaggerating a little bit, but they are pretty cool), you will need to make some tags. I chose to use the smaller tags on this die.

Cut a piece of grunge board to fit the area over the tags.


Cut a piece of grunge board to fit the area over the tags.
Run the die through your machine of choice like so.... (I have a Vintaj Big Kick- Isn't she pretty!)
 |
This is what you end up with, perfect tiny tags.


Next, paint all the tags with a paint dabber in snow cap. Allow to dry and paint the other side. You can use a heat gun to speed up this process.
Then paint the tags with distress crackle paint in picket fence. If you want small cracks, use a thin coat. Larger cracks, use a thicker coat.


Allow 10-15 minutes to dry. You can use a heat gun to help it along but not until after cracks start to appear. The pieces tend to curl a little too so I choose to just wait for them to dry on their own. Flip over and do the same on the other side.

Stamp tags with black archival ink, allow ink to dry. I usually stamp front and back, but you don't have to.


Lay your tag on a piece of regular printer paper (this is so you can easily pour your left over embossing powder back into the jar). Sprinkle the enamelware embossing powder generously over the tag making sure to cover it completely. Using some tweezers, prop the tag up so you can grasp just the edges and tap the excess powder off. Pour the remaining powder back into the jar using your handy paper funnel.


(*Note: I noticed that with every use of the embossing powder I started getting concentrated sections of white specks instead of somewhat evenly dispersed specks. I started shaking the jar really well before pouring and got better results.)
 |
| Examples of unevenly distributed "specks" |
Move all of your items aside. Brush off any embossing powder that may have gotten on your craft sheet.
Lay your tag in the middle of your work surface. I use the low setting on my heat gun, otherwise my tag would blow away. It takes a few seconds, then right before your eyes it changes in to a shiny raised surface.

If you want to emboss the back of the tag (I do because I like for it to look finished), you will need some additional tools. I utilized a nail that was sitting on my table & some pliers.
Why do I need these you ask?????? Well, from my "experience" (i.e. mess ups), if you have already embossed one side and try to emboss the other side, the side facing the work surface will remelt and stick. That is not what you want. So this is where the nail and pliers come in handy.

Now, heat the embossing powder just like the other side. I hold it up for about a minute so it can cool off before setting down on the work surface to prevent it from sticking and messing up the finish.
The only thing that is left unfinished are the edges, it is hard to get the embossing powder on them. I like to take a black sharpie marker and color the edges, then I go over it again with a silver sharpie.
So now you have these cool tags.

What do to with them? Well, I'm a jewelry person, so naturally I would make them into jewelry. Here are some of the items I have made.
 |
| Earrings from the tags in the tutorial |
 |
| Bracelet (shape was traced from a template and hand cut) |
 |
| Another bracelet. This one I used distressing ink to ad some color |
The nice thing about jewelry made with grunge board is that it's very light weight and flexible. It almost has a leather-like feel to it.
*Note: items are not waterproof, although they would probably hold up to a little bit of water. I do not recommend submerging them in water.
Hope you enjoyed my little tutorial. Let me know how your tag project turned out and don't forget to leave me some comments. Be sure to follow me too!!
I'm going to be linking up to Creatively Tuesday at the Rustic Pig!!

http://www.therusticpig.com/
I'm going to be linking up to Creatively Tuesday at the Rustic Pig!!
http://www.therusticpig.com/

No comments:
Post a Comment